

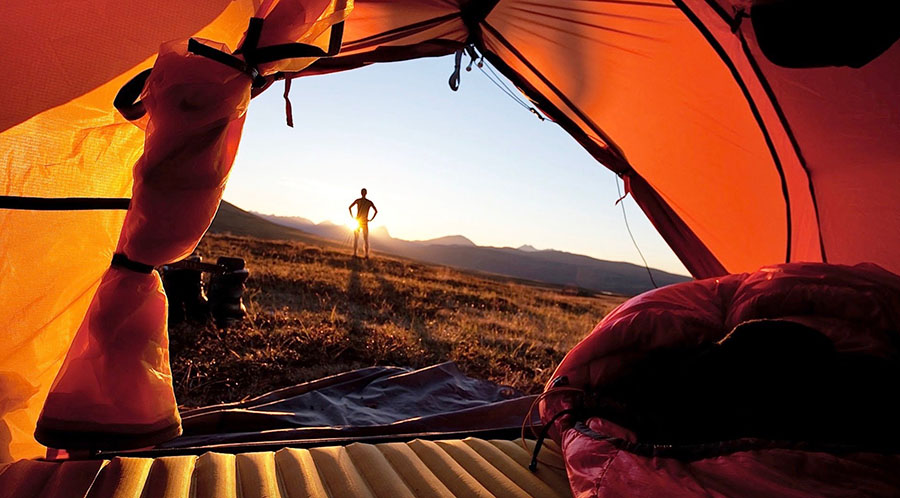
Camping with an Ostomy – How to Prepare
We weren’t kidding when we wrote our mission statement to facilitate an extraordinary life for those living with an ostomy.
So far, we’ve provided tips on surfing with ostomy, martial arts with a stoma, delivered a passport to globetrotting, and put together a comprehensive guide to ostomate sex. What more could you want? Well, given that we serve one of the most outdoorsy populations in the world, camping is the next logical choice.
Roughing it in the great Canadian outdoors means different things to different people. But unless you’re glamping (doesn’t really count) you’re in for few amenities, fewer showers, and limited access to proper bathroom facilities. For someone living with an ostomy, the prospect can be scarier than a Grizzy bear. But it doesn’t need to be. Keep reading.
4 Tips to a Successful Camping Trip When Living with a Stoma
 1. Redefine Camping Supply Necessities
The biggest impact you’ll feel on your first camping trip after receiving an ostomy will be found when writing up the supply checklist. With no stores or pharmacies in sight, you must be sure to you pack everything you need, and extras, to account for unexpected events (pick up last minute necessities on your ostomy supply list here. If you’re planning for a three-day camping trip, pack ostomy supplies for six. This may include pouches, cleansers, lotions, deodorant drops, sprays and everything else that requires multiple-use.
It goes beyond the essentials. Consider the activities on your camping trip. Is there a lake? If so (and the weather is right) you will want to bring ostomy supplies for swimming too. Will there be strenuous activities? Even something as basic as chopping and carrying firewood will be better managed with a belt and stoma guard system. With all that said, be sure not to dominate your backpack real estate with too many supplies. Have a hard look at what is absolutely necessary for an enjoyable trip – remember a lighter pack is always advisable but not having enough supplies could spell disaster. Devise one ultimate camping-with-an-ostomy checklist that you can reference with every trip and you’ll be back on track when it comes to enjoying the great outdoors.
2. Create a Clean Space
Changing your ostomy pouch in a tight-fit tent can be an uncomfortable and messy experience if you don’t have the right plan. You will need to prepare a space to lay down and a location for your supplies so that you have easy access to them. Once set up, use your backpack to create a pillow for your head so you can see what you are doing and don’t have to strain holding your head up. Go ahead and remove the old appliance. Use a few wipes to cap off the stoma to avoid a mess on your abdomen. Have a plastic bag handy for waste supplies. Clean up any adhesive as usual with your adhesive remover wipes, and then take a lint free wipe and wet it with your water bottles so you can wash the area around the stoma. Dry and reapply the new appliance. Changing the appliance laying down may take a bit of practice, but it’s easy and will allow you the flexibility to change your stoma bag in your tent, or simply on a sleeping pad. Regardless, it gives you the freedom to enjoy the backcountry without thinking about where a toilet is.
3. Bags Make Bathroom Breaks Easier
Regardless of being an ostomate or not, we all need to go to the bathroom in the woods. Depending on the location you are in, one option is to bury your waste and pack-out or burn the toilet paper. the second option is packing everything out – stool included (more likely on any icy technical routes where burying is a no-no). This is one area where living with an ostomy comes at a significant advantage! As an ostomate, you never have to worry about tip-toeing through the dark brush to go to the bathroom again. The easiest night time solution to waste management is to have a well-marked (trust me) 1 litre Nalgene bottle with the regular wide opening. Simply drain your bag into it.
While easy, practice has its benefits for not getting it on you, your bag, or your tent. Men, same goes for late night pee needs. In the morning the bottle can be packed or drained in a pit toilet or buried in the designated area. Clean up is easy – add water, shake, and drain. Add a few drops of soap and close it up. If you are sharing a tent, be sure your partner is asleep, the process is a tad stinky and what they don’t know won’t hurt them. Besides, they will be wishing for an ostomy bag after they see how easy going to the bathroom in the woods is.
4. Mind Your Food Intake, Somewhat
We’re not asking you to stay away from s’mores. Indulge all you want! But do be mindful of foods that could cause a blockage. Foods high in fibre such as raw crunchy vegetables, beans, nuts etc. should be avoided. Even a small chance of blockage should be avoided if traveling in the back country. Medical emergenices experience in the back country can have catastrophic outcomes – we need to be thinking about how our actions will affect us and our hiking/climbing partners. Be sure to keep hydrated with filtered/treated water. Ostomates ideally should be drinking more than their non ostomate counterpart. Bring vitamin packs that account for vitamin and mineral deficiencies common to ostomates, and throw in additional supplements to keep you full, healthy, and energized for all of the outdoor adventures that await. View the complete line of nutritional supplements that can accompany you on your next camping trip.
Regardless if it is your first time heading into the woods or 100th time. Plan your trip carefully, enjoy the splendor of nature and by all means laugh a bit if things get a little messy. After all it is only poo!


i would love to go in a adult ostomy group
Hi Melanie,
There are many groups available across Canada.
Click this link to learn more from Ostomy Canada.
There are also lots of amazing advocates online.
Hope this helps